SSL Certificates with Cert Manager
SSL Certificates with Cert Manager
This is walk through on how to use Cert Manager to manage SSL certificates for your Kubernetes cluster.
Why?
Best practice is to use SSL certificates for all your services. This is to ensure that all traffic is encrypted and secure. With cert manager you can do this with ease. Then we can tie this into the Ingress controller to make it easy for traffic to secured, and removes the chance of accidentally sending unencrypted sensitive traffic.
Requirements
- Kubernetes Cluster(k3s,Kind,Minikube)
- Helm
- Kubectl
- Linux shell
- Traefik Ingress Controller installed
- A public domain name owned by you using Cloudflare DNS
Step 1: Install Cert Manager
First up we need to install the cert-manager into the cluster. This will allow us to create SSL certificates for our services. This will set up the CRDs and the cert-manager pods in the cluster.
### I would recommend using the latest version of cert-manager
kubectl apply -f https://github.com/cert-manager/cert-manager/releases/download/v1.16.1/cert-manager.yaml
Wait to ensure that the cert-manager is installed and running.
kubectl get pods --namespace cert-manager
which should return something like this:
NAME                                       READY   STATUS    RESTARTS   AGE
cert-manager-6f8d4b7b5b-7z5zv              1/1     Running   0          2m
cert-manager-cainjector-5b4b4b4b4b-7z5zv   1/1     Running   0          2m
cert-manager-webhook-5b4b4b4b4b-7z5zv      1/1     Running   0          2m
Wait for all the pods to be running before continuing.
Step 2: Create a Cluster Issuer
First up we need to create an api token for Cloudflare to allow the cert-manager to create and update DNS records in Cloudflare for the DNS-01 challenge. This removes needing to have an ingress controller that is exposed to the internet.
Step 2.1: Create a secret for the Cloudflare API Key
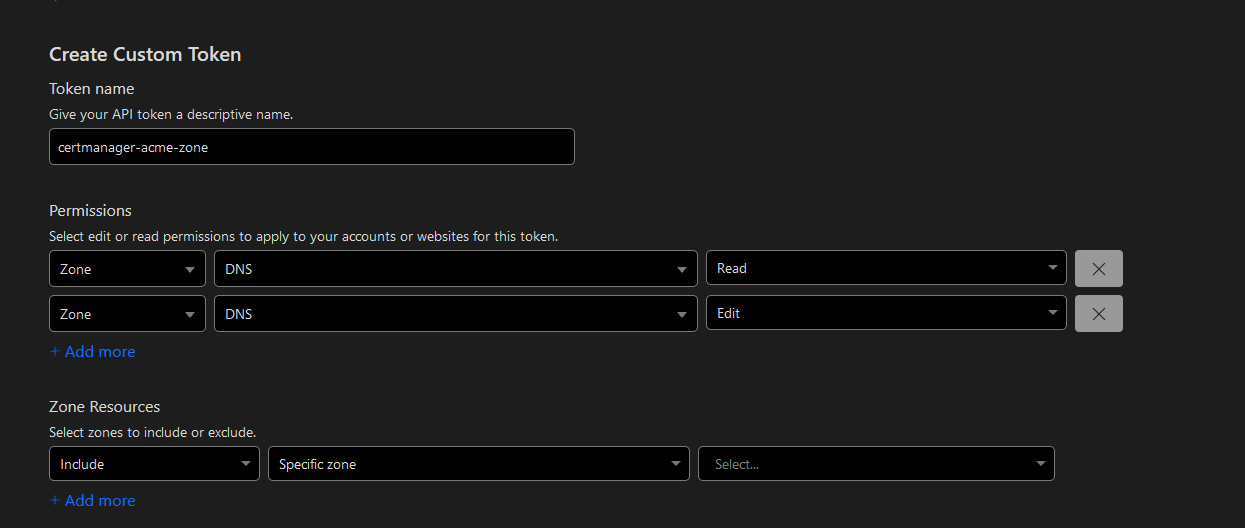
Generate a Cloudflare API Token with the following permissions:
- Zone:Zone:Read
- Zone:DNS:Edit
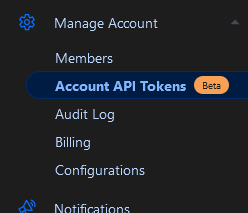
In the Cloud flare dashboard, go to the Account API Tokens page:
Then click on the Create Token button.

This will allow the cert-manager to create and update DNS records in Cloudflare for the DNS-01 challenge.
Pick a descriptive name for the token and select the permissions in the image below:
Then select the domain that you want to use for the SSL certificate.
You should set a TTL with this token to ensure that the token is not used for longer than this test.
Then click on the Continue to Summary button, and then click on the Create Token button.
Then copy the token to a safe place as you will not be able to see it again.
Now using the token we can create a Kubernetes secret for the Cloudflare API Key
kubectl apply -f  -n certmanager - <<EOF
apiVersion: v1
kind: Secret
metadata:
  name: cloudflare-api-token-secret
type: Opaque
stringData:
  api-token: <your-cloudflare-api-token>
EOF
Step 2.2: Create a Cluster Issuer File
Now we can create a Cluster Issuer file for the Cloudflare DNS provider.
kubectl apply -f  -n certmanager - <<EOF
apiVersion: cert-manager.io/v1
kind: ClusterIssuer
metadata:
  name: test-issuer
spec:
  acme:
    # Add your email address to get notified of expiring certificates
    email: EMAIL_ADDRESS
    server: https://acme-v02.api.letsencrypt.org/directory
    # Name of a secret used to store the ACME account private key. This will be created at runtime
    privateKeySecretRef:
      name: test-issuer-account-key
    solvers:
      - dns01:
          cloudflare:
            apiTokenSecretRef:
            # Secret key for the Cloudflare API token created above
              name: cloudflare-api-token-secret
              key: api-token
EOF
Step 3: Create a Certificate
Now we can create a certificate for the domain that you want to use.
Here we are going to create a certificate for the domain test.YOUR_DOMAIN_NAME replace YOUR_DOMAIN_NAME with your domain name. We are going to create a new namespace for the certificate to keep it separate from the rest of the cluster.
kubectl create namespace test-cert-issue
Then we are going to create the certificate file in that namespace.
kubectl apply -n test-cert-issue  -f - <<EOF
apiVersion: cert-manager.io/v1
kind: Certificate
metadata:
  name: test-certificate
spec:
  secretName: test-tls
  privateKey:
    algorithm: RSA
    encoding: PKCS1
    size: 2048
  dnsNames:
    - test.YOUR_DOMAIN_NAME
  commonName: test.YOUR_DOMAIN_NAME
  issuerRef:
    name: test-issuer
    kind: ClusterIssuer
EOF
We can watch the issuing process with the following command:
kubectl get certificate -n test-cert-issue test-certificate -o jsonpath='{.status.conditions[?(@.type=="Ready")].message}'
Which should return after a few minutes:
kubectl get certificate -n test-cert-issue test-certificate -o jsonpath='{.status.conditions[?(@.type=="Ready")].message}'

Certificate is up to date and has not expired
Now we can inspect the certificate with the following command:
kubectl get secret -n test-cert-issue test-tls -o jsonpath='{.data.tls\.crt}' | base64 -d | openssl x509 -text | less
Which should return something like this:
Certificate:
    Data:
        Version: 3 (0x2)
        Serial Number:  03:8
        Signature Algorithm: sha256WithRSAEncryption
        Issuer: C = US, O = Let's Encrypt, CN = R3
        Validity
            Not Before: Oct  9 14:00:00 2024 GMT
            Not After : Jan  7 14:00:00 2025 GMT
        Subject: CN = test.YOUR_DOMAIN_NAME
At this point, you have a valid SSL certificate for your domain. 🎉🎉🎉
Step 4: Add the Certificate to the Ingress
Now we can add the certificate to the Ingress Controller. But first we need to create a service to expose the Ingress Controller.
kubectl apply  -n test-cert-issue -f - <<EOF
apiVersion: v1
data:
  index.html: |
    <!DOCTYPE html>
    <html lang="en">
    <body>
        <p>wooo HTTPS <p>
    </body>
    </html>
kind: ConfigMap
metadata:
  name: nginx-html
---
apiVersion: v1
kind: Pod
metadata:
  name: nginx
  labels:
    app: nginx
spec:
    containers:
    - name: nginx
      image: nginx
      ports:
        - containerPort: 80
      volumeMounts:
        - name: nginx-html
          mountPath: /usr/share/nginx/html
    volumes:
        - name: nginx-html
          configMap:
            name: nginx-html
EOF
Now we can create an Ingress for the service.
kubectl apply   -n test-cert-issue -f  - <<EOF
apiVersion: v1
kind: Service
metadata:
  name: nginx
spec:
    selector:
        app: nginx
    ports:
        - protocol: TCP
          port: 80
          targetPort: 80

EOF
kubectl apply  -n test-cert-issue -f  - <<EOF
apiVersion: networking.k8s.io/v1
kind: Ingress
metadata:
  name: test-ingress
  annotations:
     kubernetes.io/ingress.class: traefik
spec:
  ingressClassName: traefik
  rules:
  - host: test.YOUR_DOMAIN_NAME
    http:
      paths:
      - backend:
          service:
            name: nginx
            port:
              number: 80
        path: /
        pathType: Prefix
  tls:
  - hosts:
    - test.YOUR_DOMAIN_NAME
    secretName: test-tls
EOF
Step 5: Test the Certificate
Now you can test the certificate by going to the domain test.YOUR_DOMAIN_NAME with curl
First we need to get one of the IP addresses of the Ingress Controller
kubectl get ingress -n test-cert-issue nginx -o jsonpath='{.status.loadBalancer.ingress[0].ip}'
Which should return something like this:
123.45.67.89
Now you can test the certificate with the following command:
curl https://test.YOUR_DOMAIN_NAME --resolve 123.45.67.89:443:test.YOUR_DOMAIN_NAME
and you should see the following output with no errors:
<!DOCTYPE html>
<html lang="en">
<body>
    <p>wooo HTTPS <p>
</body>
</html>
Or add in cloudflare an A record to the IP above with proxy status DNS ony and you test it with a browser.